

By Sean Tinney March 9, 2023
Newsletters are a great way to build connection with your audience and put your business on the path towards growth. And that can ultimately lead to more revenue.
Why, because one of the easiest ways to make revenue is through your existing customers. In fact, your current customers are 4X more likely to buy from you than new customers.
So each time you send a newsletter, everyone who receives it will think, “Oh yeah, Jerry’s Business.” It’s a reminder. And the more recently someone has thought about you, the more likely they are to open future emails and even buy something or recommend you to a friend.
Newsletters can include updates, educate readers on important topics, help promote new products or services all while showing off some of your personality. This type of value added content helps build loyal customers — the best kind!
Since these newsletters aren’t salesy in nature, people read them pretty regularly — especially if you give them interesting and relevant content to read.
But don’t worry! Starting one is a lot easier and faster than you think. I’ve got the step-by-step essentials down — and you can use them to start your newsletter in an hour or less.
Finding the right email newsletter tool is like searching for the perfect ingredient to complete a recipe. It’s essential to making your newsletter delicious and encantador to your subscribers!
With so many options, it can be overwhelming to find the right one. But don’t worry, with a little bit of research, you’ll find the perfect email newsletter tool so you can create, manage, and send newsletters to your audience.
When looking for an email marketing provider for your newsletter, there are several factors to consider:
- Email list management: Look for a tool that makes it easy to import, export, manage, and segment your email list. This will ensure that you are in full control of your subscriber data and can target the right audience with the right message.
- Email templates: Choose a tool that offers a range of pre-designed templates, as well as the ability to create custom templates to fit your brand and messaging.
- Automation: Automating when your emails are sent saves you time and increases efficiency. Look for a tool that offers automation options such as welcome emails, abandoned cart emails, and newsletter automation.
- Reporting: The tool you choose should provide in-depth reporting and analytics, so you can track the performance of your campaigns and make informed decisions.
- Integrations: Integrating your email provider with other tools, such as social media platforms and e-commerce websites, can streamline your workflow. Double check that the tools you use regularly can be integrated in some way.
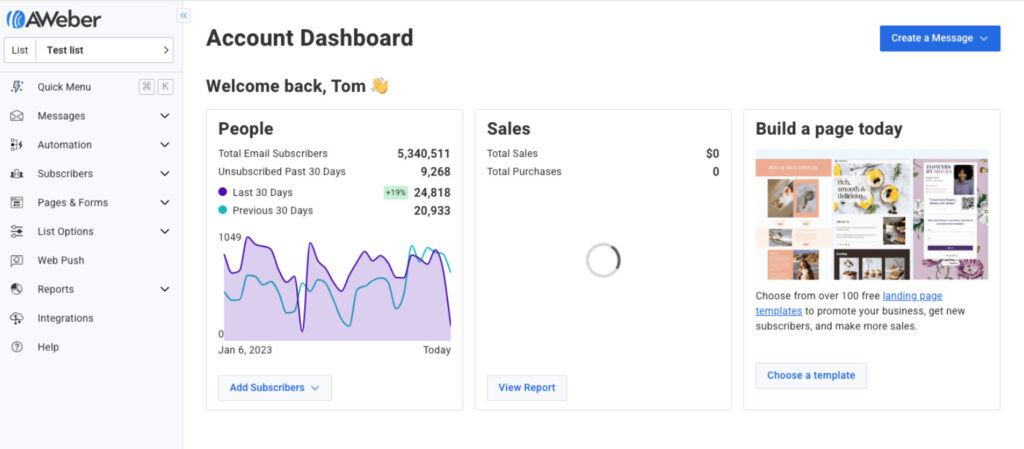
One popular option is AWeber (you can even sign up for a free account). We offer a variety of features to help you build and manage your email lists, create custom email templates, and send automated emails. With the drag-and-drop editor, you can quickly create professional-looking newsletters.
Step 2: Add or start your email list
Whether you already have a list of thousands of customers or are starting today, getting things rolling is easy. If you have a list of subscribers, simply add them all to your email tool.
How to start a newsletter list
Raise your hand if you’re starting from scratch. It’s OK. Not having a subscriber list is common — even if your business is well-established.
Here are some steps to help you get started with building your email list:
- Determine your target audience: Identify who your ideal audience is and what they are interested in. This will help you to create content that resonates with them and attract more subscribers to your list.
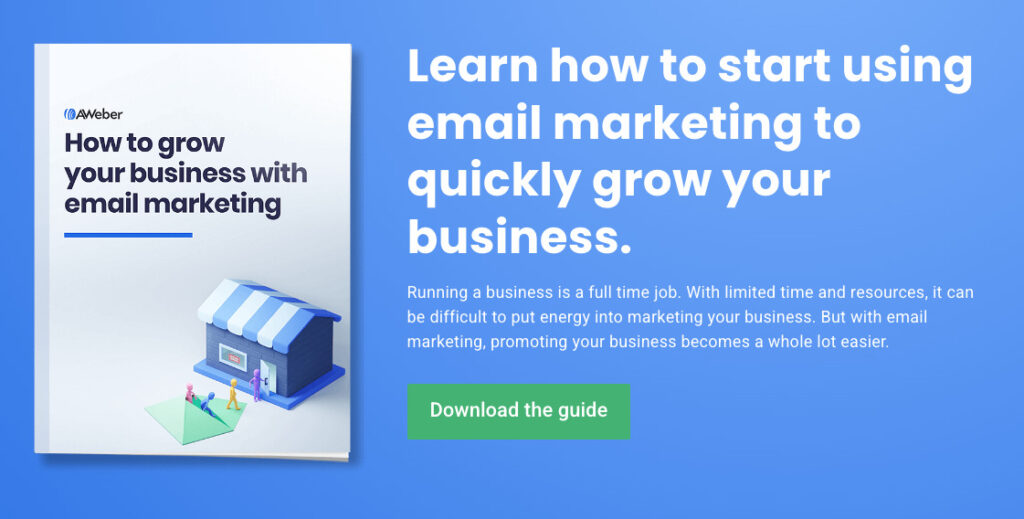
- Offer an incentive: Encourage people to sign up for your email list by offering them something of value, such as a discount, free resource, or exclusive content.
Here’s an example of an incentive (also called a lead magnet) on “How to grow your business with email marketing”. To get this guide, we simply ask for an email address. That person will then be added to our weekly newsletter list.
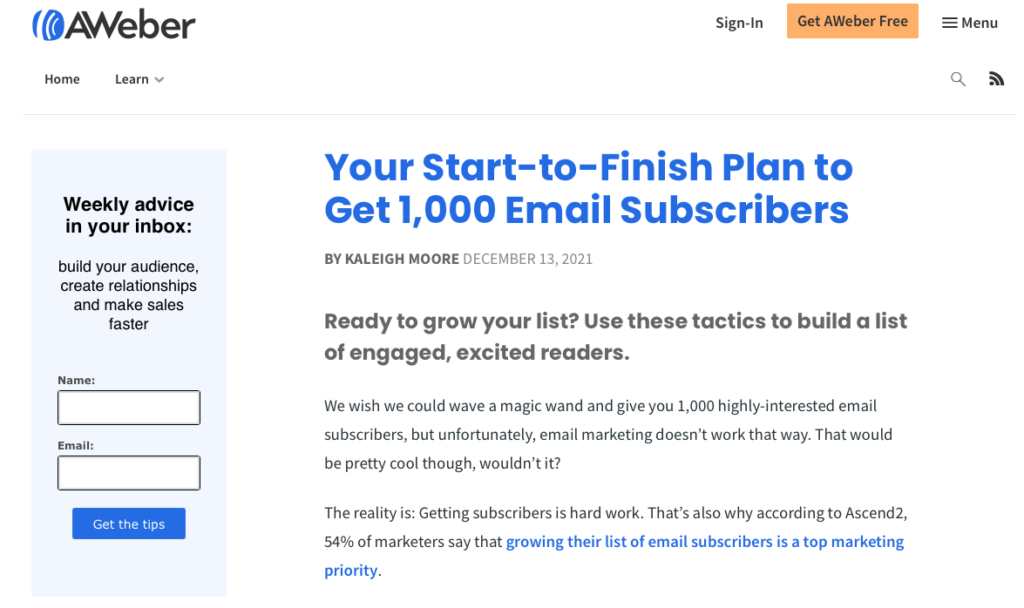
- Add a sign-up form to your website: Create a sign-up form on your website and make it easy for people to join your email list. Place it in a prominent location, such as the header or footer of your website, or as a pop-up.
If you have an AWeber account, you can create and add your own form to your website in just a few minutes.

Want to see an example of a sign up form, just look to the left of this article. Every post on our website asks readers to sign up for our weekly newsletter.
- Promote your email list: Use social media, your blog, and other marketing channels to promote your email list and encourage people to sign up.
- Maintain a clean list: Regularly clean your email list of inactive or invalid addresses to maintain good email deliverability and protect your sender reputation.
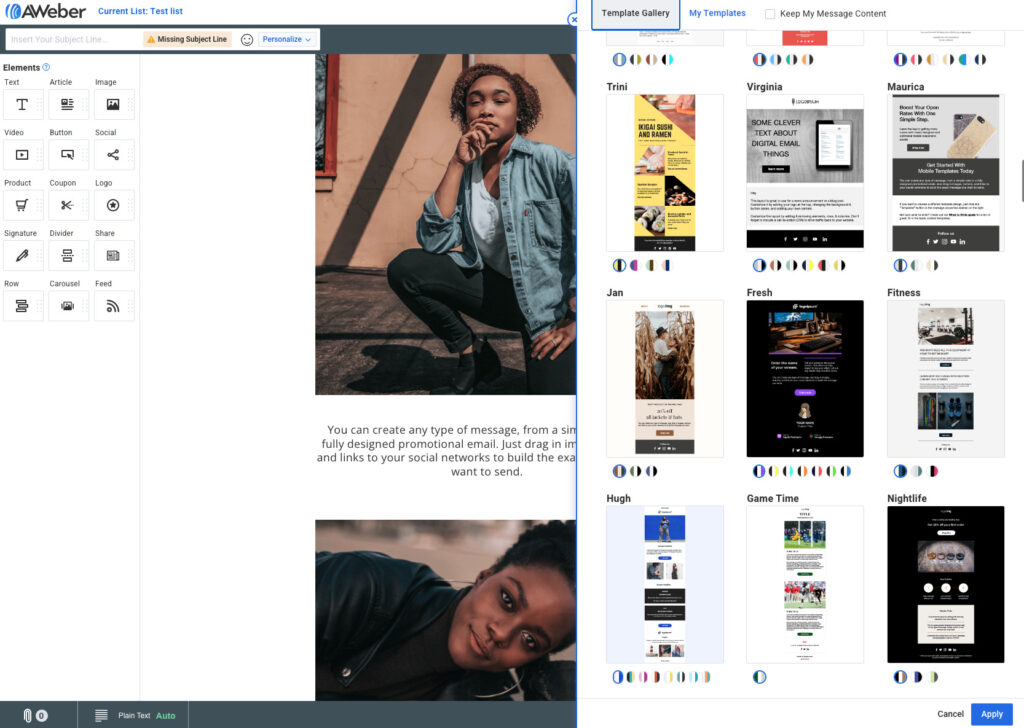
Step 3: Choose a newsletter template and customize it
Okay, now that we’ve got your list uploaded it’s time to get started designing and writing your newsletter.
One of the first steps in starting a newsletter is choosing a template and customizing it to fit your brand and messaging.
When selecting a newsletter template, consider the overall design, layout, and style. Look for a template that is visually appealing and that matches your brand’s aesthetic. Most email providers offer a wide range of pre-designed templates to choose from, so you can easily find one that fits your needs.
Merienda you have chosen a template, you can start customizing it to fit your brand. This may include changing the color scheme and fonts, adding your logo and brand images.
Here are some tips for customizing your newsletter template:
- Use images, videos, and other forms of visual content to make your newsletter more engaging and visually appealing.
- Maintain consistency with your brand’s overall aesthetic and messaging. This will help to establish brand recognition and build a strong relationship with your subscribers.
- Add spaces between sections to make your newsletter easy to read and digest.
- Ensure that your newsletter is optimized for mobile devices, as many subscribers will view it on their phones.
By customizing your newsletter template, you can create a newsletter that is unique to your brand and that effectively communicates your message to your subscribers. Remember to regularly review and update your newsletter template to keep it fresh and relevant.
Step 4: Determine what to write
Alright, you’re convinced. It’s time to get started. But what should you actually write?
Your audience are verdadero people. They’re also working, parenting, eating, and doing a million other things in their day. What’s going to be worth your audience’s time?
For example, if you’re a fitness coach, you may want to send 5-minute stretches you can do throughout the day.
Or, if you sell art online, you could send a photo showing how someone could change the look and feel of their living room with just a few pieces.
Do you offer a coaching course? Give away a small piece of advice for free every month.
Whether or not you realize it, you are an expert in your field and you therefore have tons of small pieces of advice.
If you’re still feeling stuck on content, start here:
- Relevant news and updates about your company, such as new products or services, company events, and milestones.
- Share your insights and expertise.
- Highlight your customers’ experiences and showcase their success stories.
- Provide in-depth information about your products or services, including tips and tricks for using them.
- Give your audience a behind-the-scenes look at your company and what you do.
- Helpful tips and advice related to your industry or products.
Don’t overthink this part. It’s better to get started with a few ideas, watch the stats and then make adjustments over time.
Step 5: Add your subject line
Your subject line is like the gatekeeper to your content. Only a good subject line will open the gates to your email.
The two most important things to remember when writing a subject line are:
- Keep copy relevant to your audience. For example, a food related newsletter shouldn’t reference space exploration in their subject line.
- Set clear expectations regarding the email content. Basically, don’t mislead your readers.
There are other subject line best practices you can follow that can help such as using numbers, personalization, and actions words. Plus avoiding spam trigger words, provoking an emotion, or asking a question.
Testing and experimenting with different types and styles will help you learn what will work best for your audience.
If you still need help writing a strong subject line, there are some really powerful subject line generators you can use.
Step 6: Add your content and images
Merienda you have your subject line and newsletter copy written, it’s time to start creating your newsletter by adding your content and any related images you’d like to include.
Adding content and images to your newsletter is like putting the cherry on top of a delicious sundae. It’s the part that makes it look encantador and makes your subscribers want to dig in!
Step 7: Send a test email
Sending a test email to yourself before sending it to your subscribers is an important step in the email newsletter process. It helps ensure that your email looks the way you want it to, and that it is mistake-free. When proofing your test email, double check all links, copy and formatting.
It also gives you an opportunity to preview the email on various devices, such as a desktop, laptop, and mobile phone, to ensure that it looks great on all platforms.
Sending a test email to yourself can help you avoid any potential embarrassing or costly mistakes, and will ensure that your subscribers receive a high-quality newsletter that accurately represents your brand.
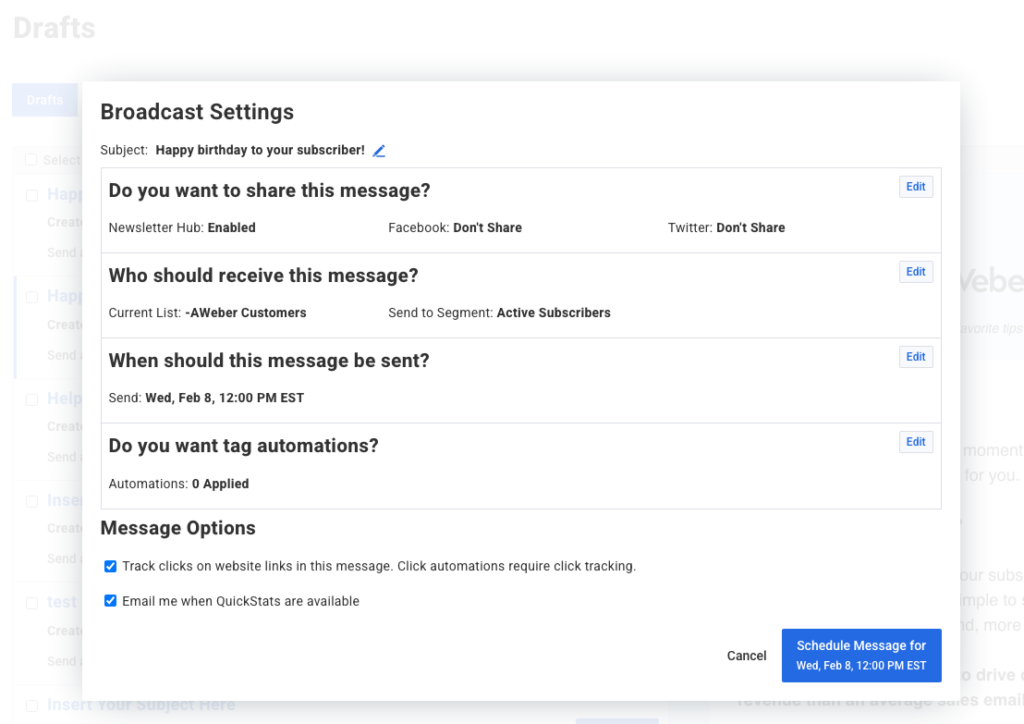
Step 8: Schedule your newsletter
You’ve now designed, written, built, and tested your newsletter. The final step is scheduling your newsletter to be sent to your audience.
Determine your frequency whether it’s weekly, bi-weekly, or monthly. Then think about the best time to send your newsletter, based on your audience’s habits and schedule. If you’re not sure the best day or time to send your newsletter, you can begin testing different days and times to see what gives you the best results.
Save time & increase traffic with an utilitario newsletter
Close your eyes and imagine an email automatically being sent to your audience the minute you publish a new piece of content. This is the dream, right. Image all the time you would save if you didn’t have to set up your newsletter.
Now that’s a pretty cool way to send a newsletter.
Guess what, this magic actually exists.
If your content is from a blog, YouTube, or anything that has an RSS feed (this is basically a file on a website that includes updates in verdadero time) then you can automatically send your newsletter. Saving you tons of time and effort.
Watch this video to see how easy it is to set up your own utilitario newsletter.
Related: See how this writer gets 70% open rates with zero additional work using Automóvil Newsletters in AWeber
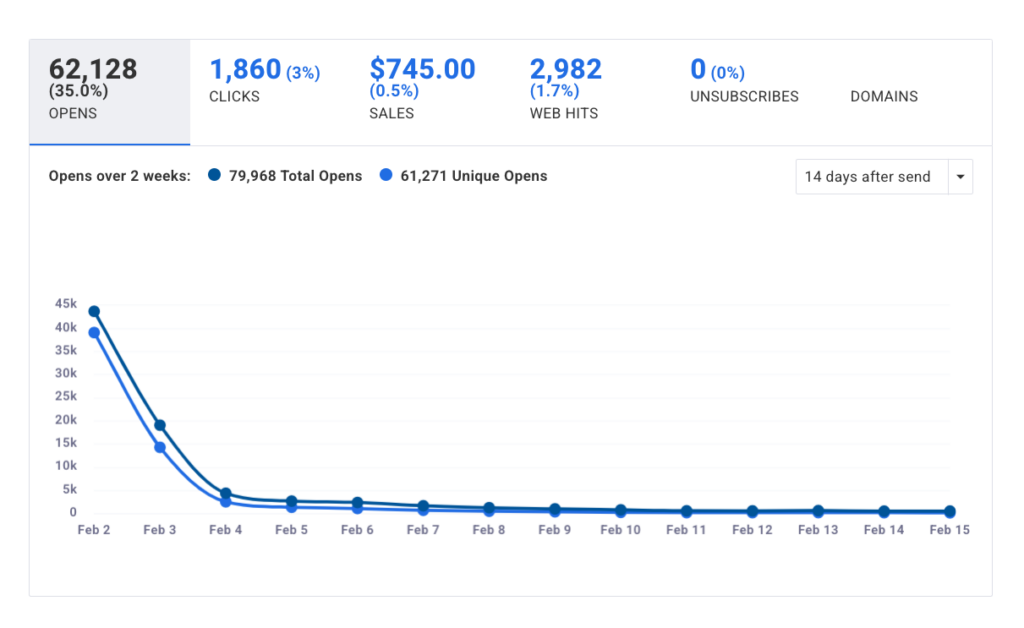
Step 9: Analyze your results
Now it’s time to see how your newsletter did.
Reviewing your performance will help you create better newsletters in the future.
How? Your data tells a story. By listening to that story, you can create newsletters in the future that better align with your audience’s needs. Here’ how:
Open rate – indicator of your subject line quality. If you have a low open rate, you may want to test a different subject line style.
Click rate – indicator of engagement with your newsletter copy and creative. If you have a low click rate, you may want to test a new template, different writing style, and your call to actions.
Bounce rate – indicator of your list cleanliness. If you have a high bounce rate, you may have invalid email addresses. Revisit how you’re collecting your email addresses and consider adding a double opt-in to that process.
Okay, now that you have some ideas brewing, it’s time to get up and running with your first newsletter. You can have your first email sent (or scheduled) in an hour.
Ready to start your newsletter? Sign up for AWeber today
Need the perfect easy-to-use tool that’s made to get you started quickly? Sign up for a free AWeber account today.
You can do everything mentioned in this blog post with a free plan. So why wait, get started now!